Stop Retyping Prompts: Master .prompt.md Files in VS Code Copilot
The Problem You Don’t Know You’re Solving
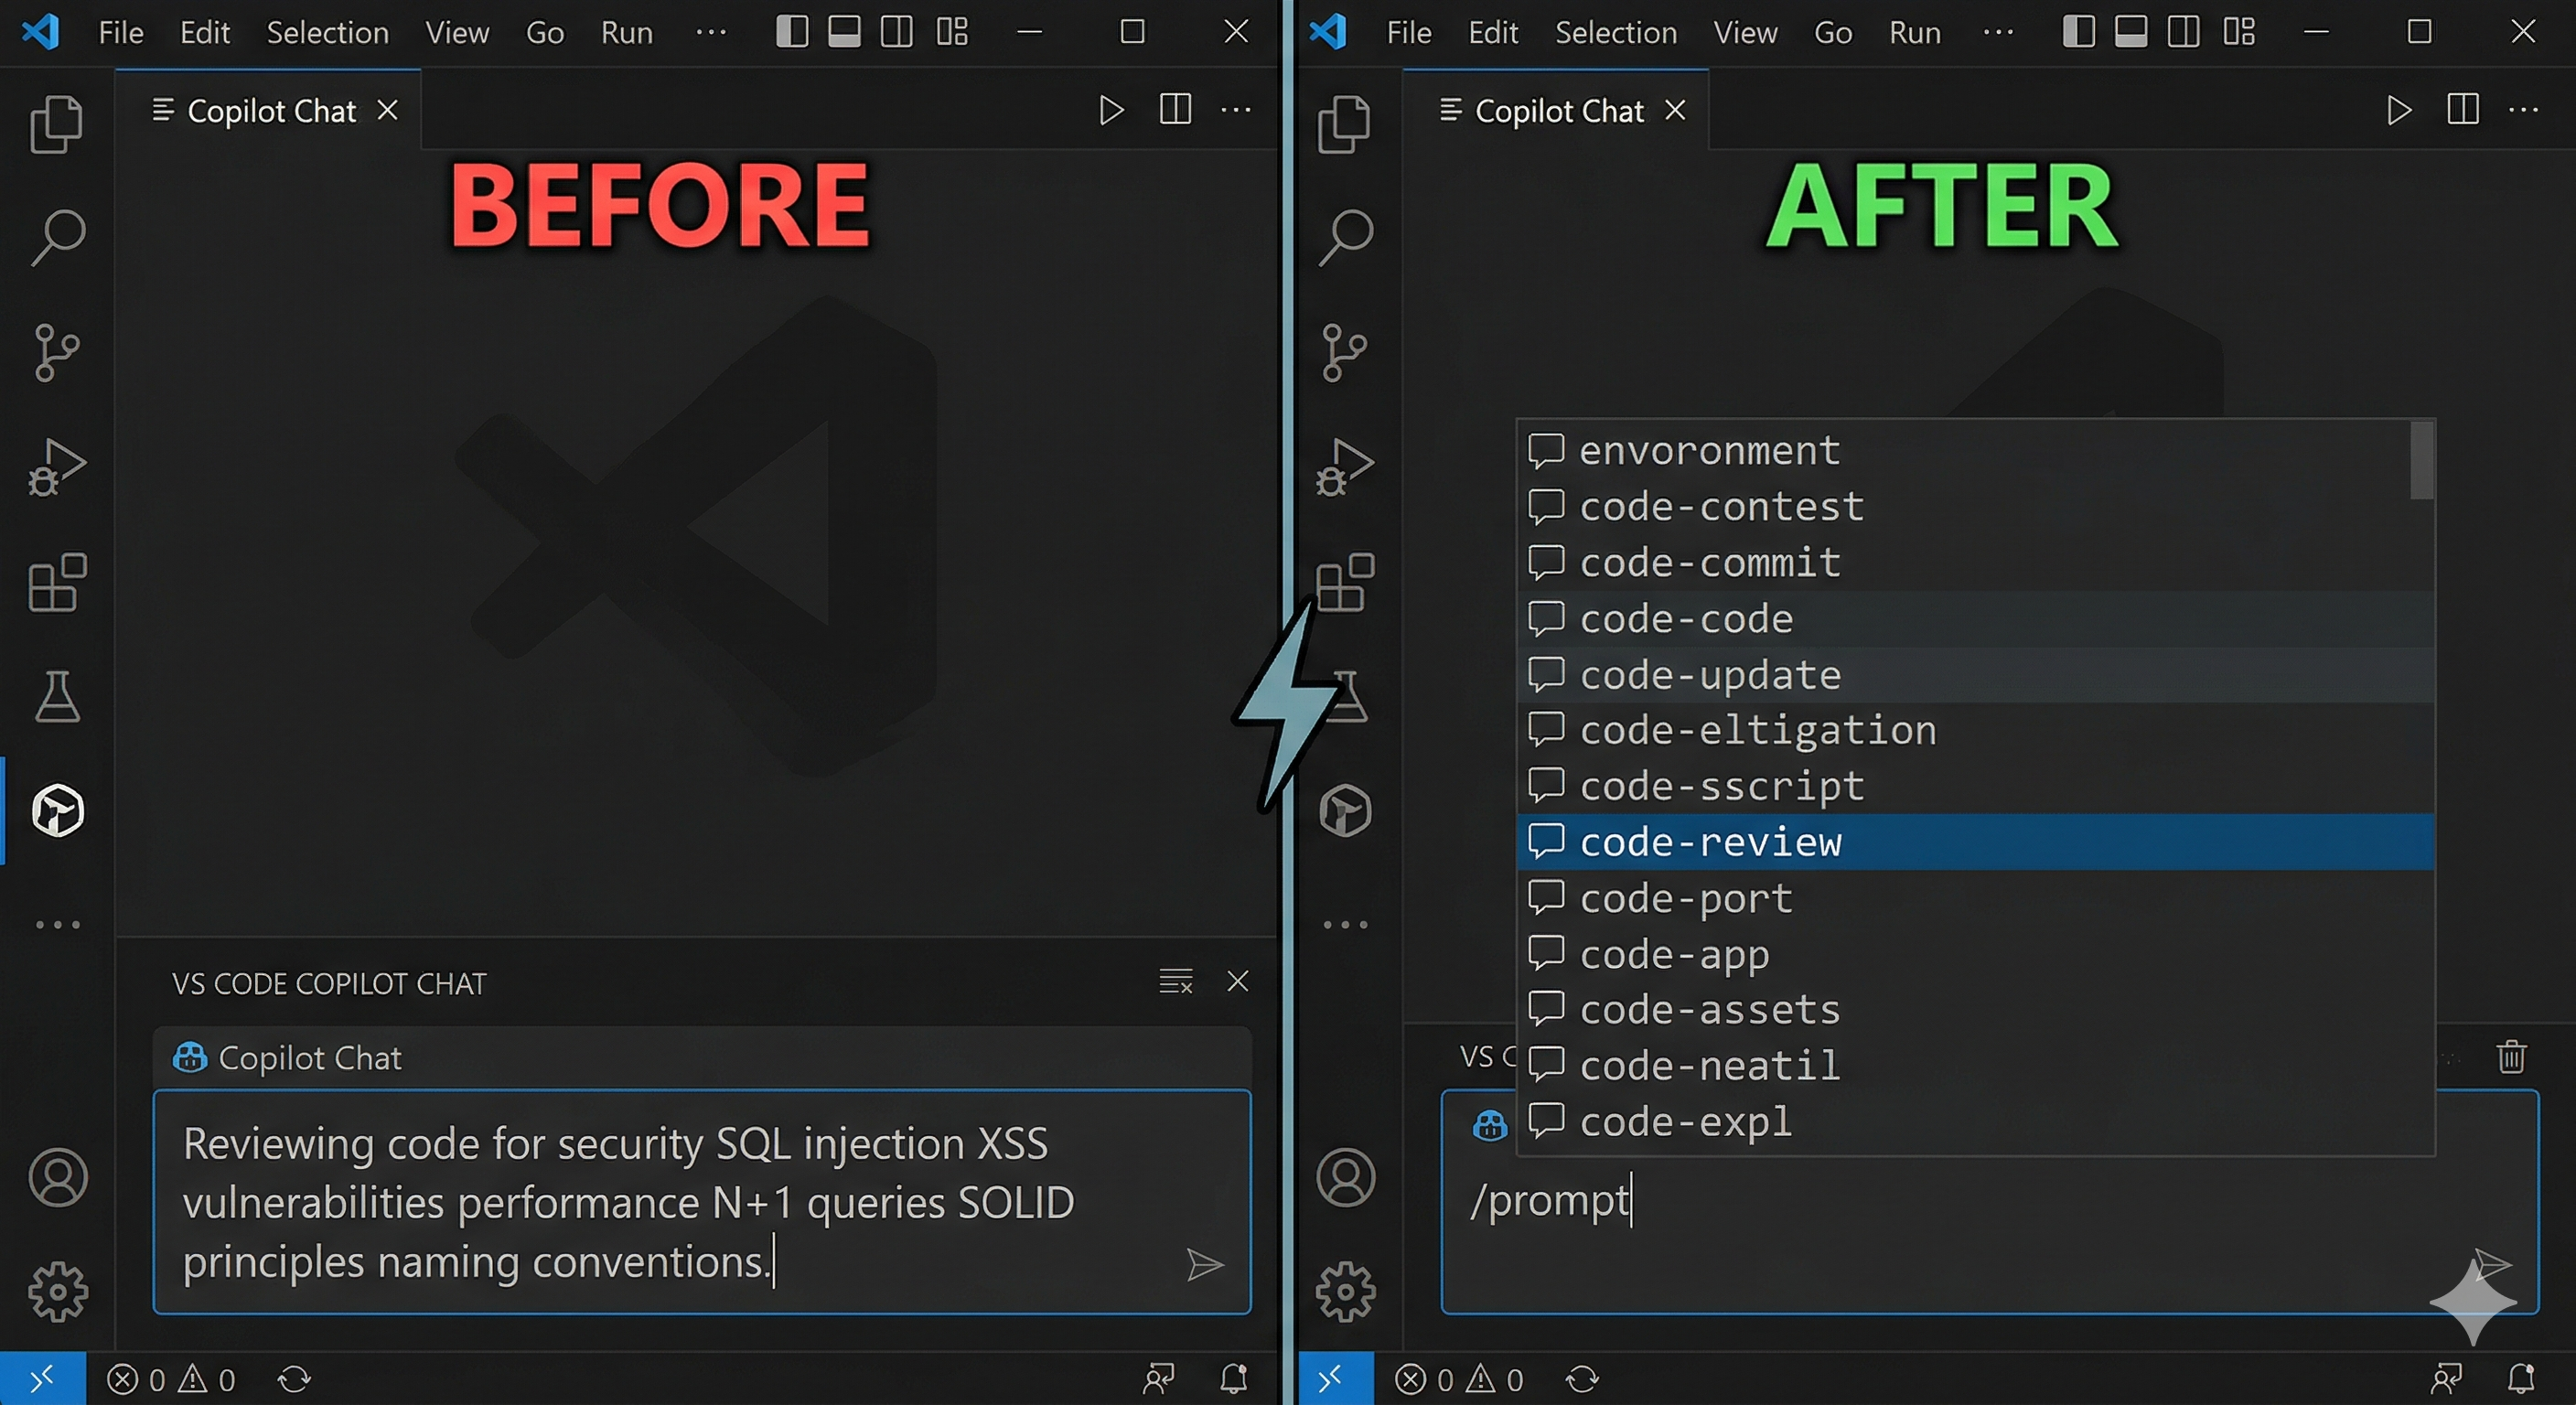
You’re about to ask Copilot to review your code. Again. So you pull up your mental template:
“Please review this code for security vulnerabilities, performance issues, and adherence to our team’s naming conventions. Focus especially on…”
Sound familiar? You’ve typed this a hundred times. Each time slightly differently. Each time burning 30 seconds you don’t have — and getting subtly inconsistent results because you remembered it slightly differently each time.
Here’s the painful reality: Developers repeat the same high-value prompts dozens of times a week — code reviews, test generation, PR descriptions, documentation. Retyped from memory each session, producing slightly different results every time.
Here’s the solution: The .prompt.md file. Write your best prompt once, store it in .github/prompts/, and call it instantly with /prompt in Copilot Chat. Same prompt, every time, in two keystrokes. Commit it to your repo, and your entire team gets it too.
This post shows you how to set it up in under 5 minutes — and how to build a prompt library that multiplies your team’s productivity.
What is a .prompt.md File?
A .prompt.md file is a reusable prompt template stored in your project. It lives in .github/prompts/ and can be invoked directly from Copilot Chat using the /prompt command.
Think of it as a macro for your AI conversations — write it once, use it forever.
Why It Matters
Without .prompt.md | With .prompt.md |
|---|---|
| Retype the same prompt every session | Invoke it in 2 keystrokes |
| Slight variations produce inconsistent results | Same structured prompt, every time |
| Prompt quality varies by mood and memory | Your best prompt, on demand |
| Knowledge dies with the individual | Committed to the repo, shared with the team |
How It Works
- You create a
.mdfile in.github/prompts/ - The file contains your prompt text (and optional frontmatter)
- In Copilot Chat, you type
/promptand select your file from the dropdown - Copilot loads the full prompt and executes it against your current context
Step-by-Step Guide: Creating and Using .prompt.md Files
Step 1: Create the Prompts Folder
If it doesn’t already exist, create the prompts directory in your project:
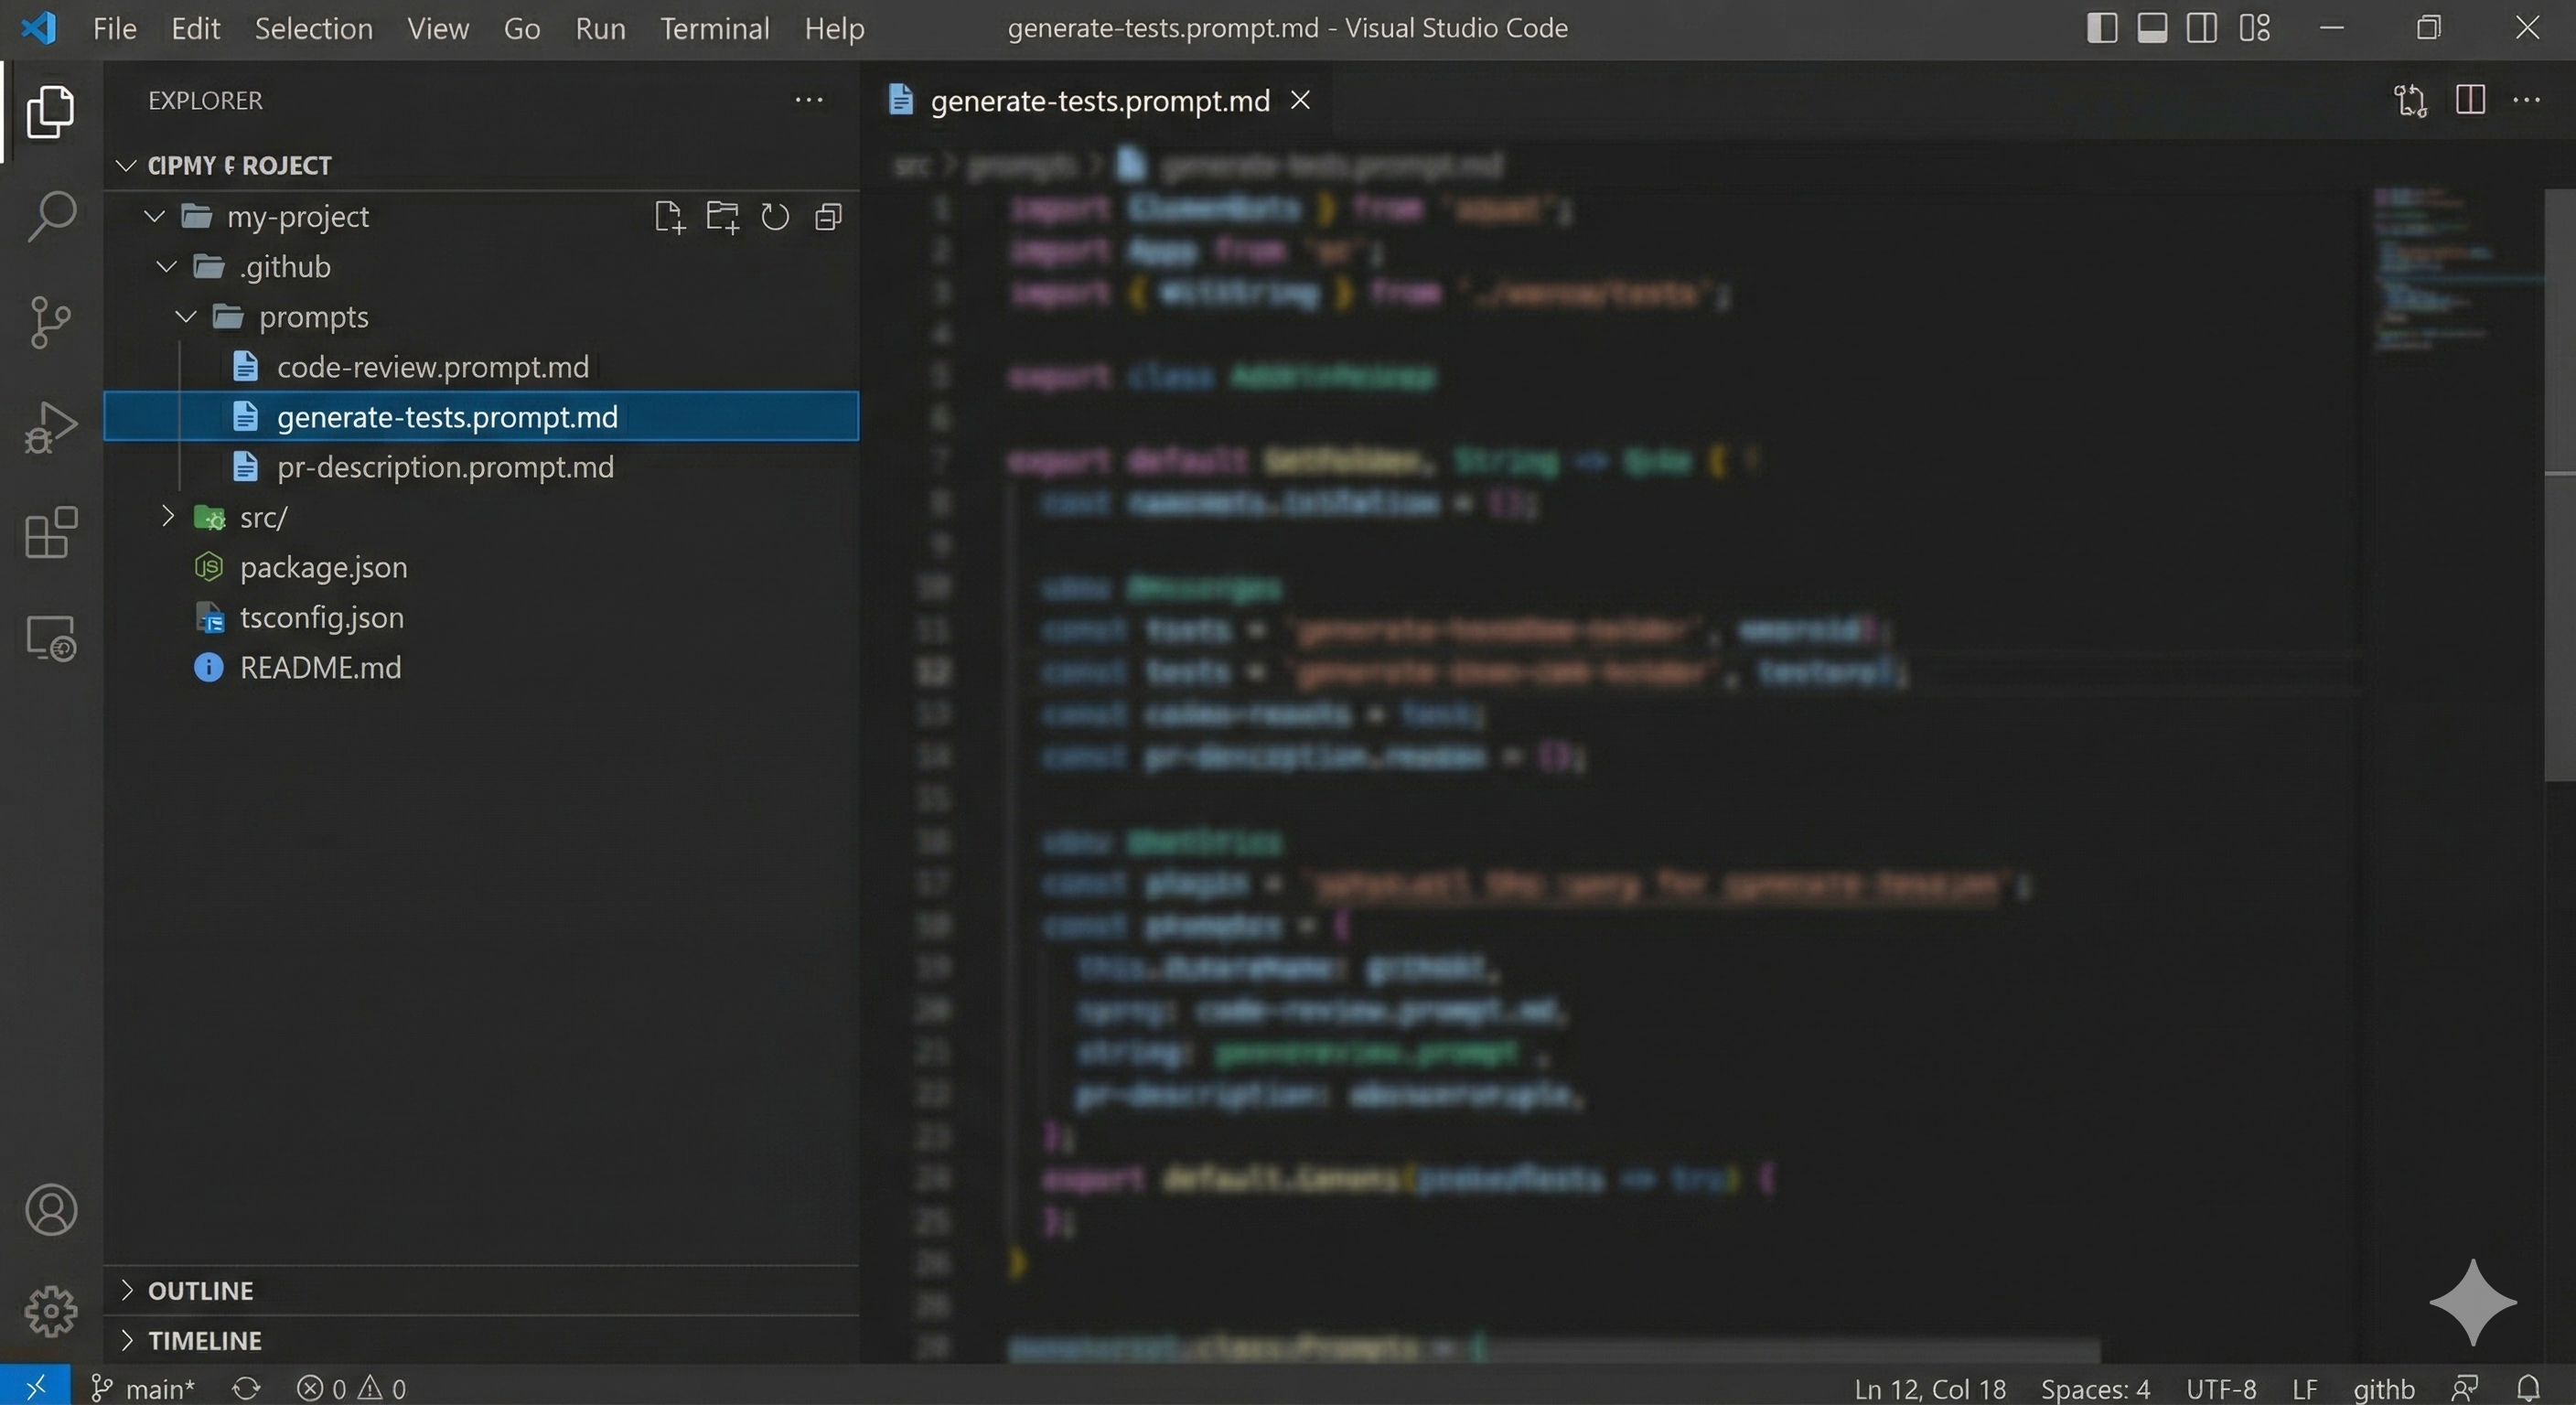
.github/
└── prompts/
    ├── code-review.prompt.md
    ├── generate-tests.prompt.md
    └── pr-description.prompt.md
In VS Code’s Explorer panel, right-click your project root → New Folder → type .github/prompts.
Step 2: Write Your First .prompt.md File
Create a new file named code-review.prompt.md inside .github/prompts/. Here’s a solid starting template:
---
description: "Comprehensive code review for security, performance, and maintainability"
---

Please review the selected code for the following:

## Security
- Input validation and sanitization
- Authentication and authorization gaps
- Potential injection vulnerabilities (SQL, XSS, etc.)
- Sensitive data exposure

## Performance
- Unnecessary computations or re-renders
- Missing memoization opportunities
- N+1 query patterns
- Large dependency imports

## Code Quality
- Adherence to SOLID principles
- Naming clarity (variables, functions, classes)
- Cyclomatic complexity — flag anything above 10
- Missing or incomplete error handling

## Summary
Provide a prioritized list of issues: Critical → High → Medium → Low.
End with 1-2 specific, actionable improvements to make first.
Key points:
- The
descriptionfrontmatter helps identify the prompt in the/promptdropdown - Use clear headers to structure multi-part prompts
- Be specific — vague prompts produce vague output

Step 3: Invoke Your Prompt with /prompt
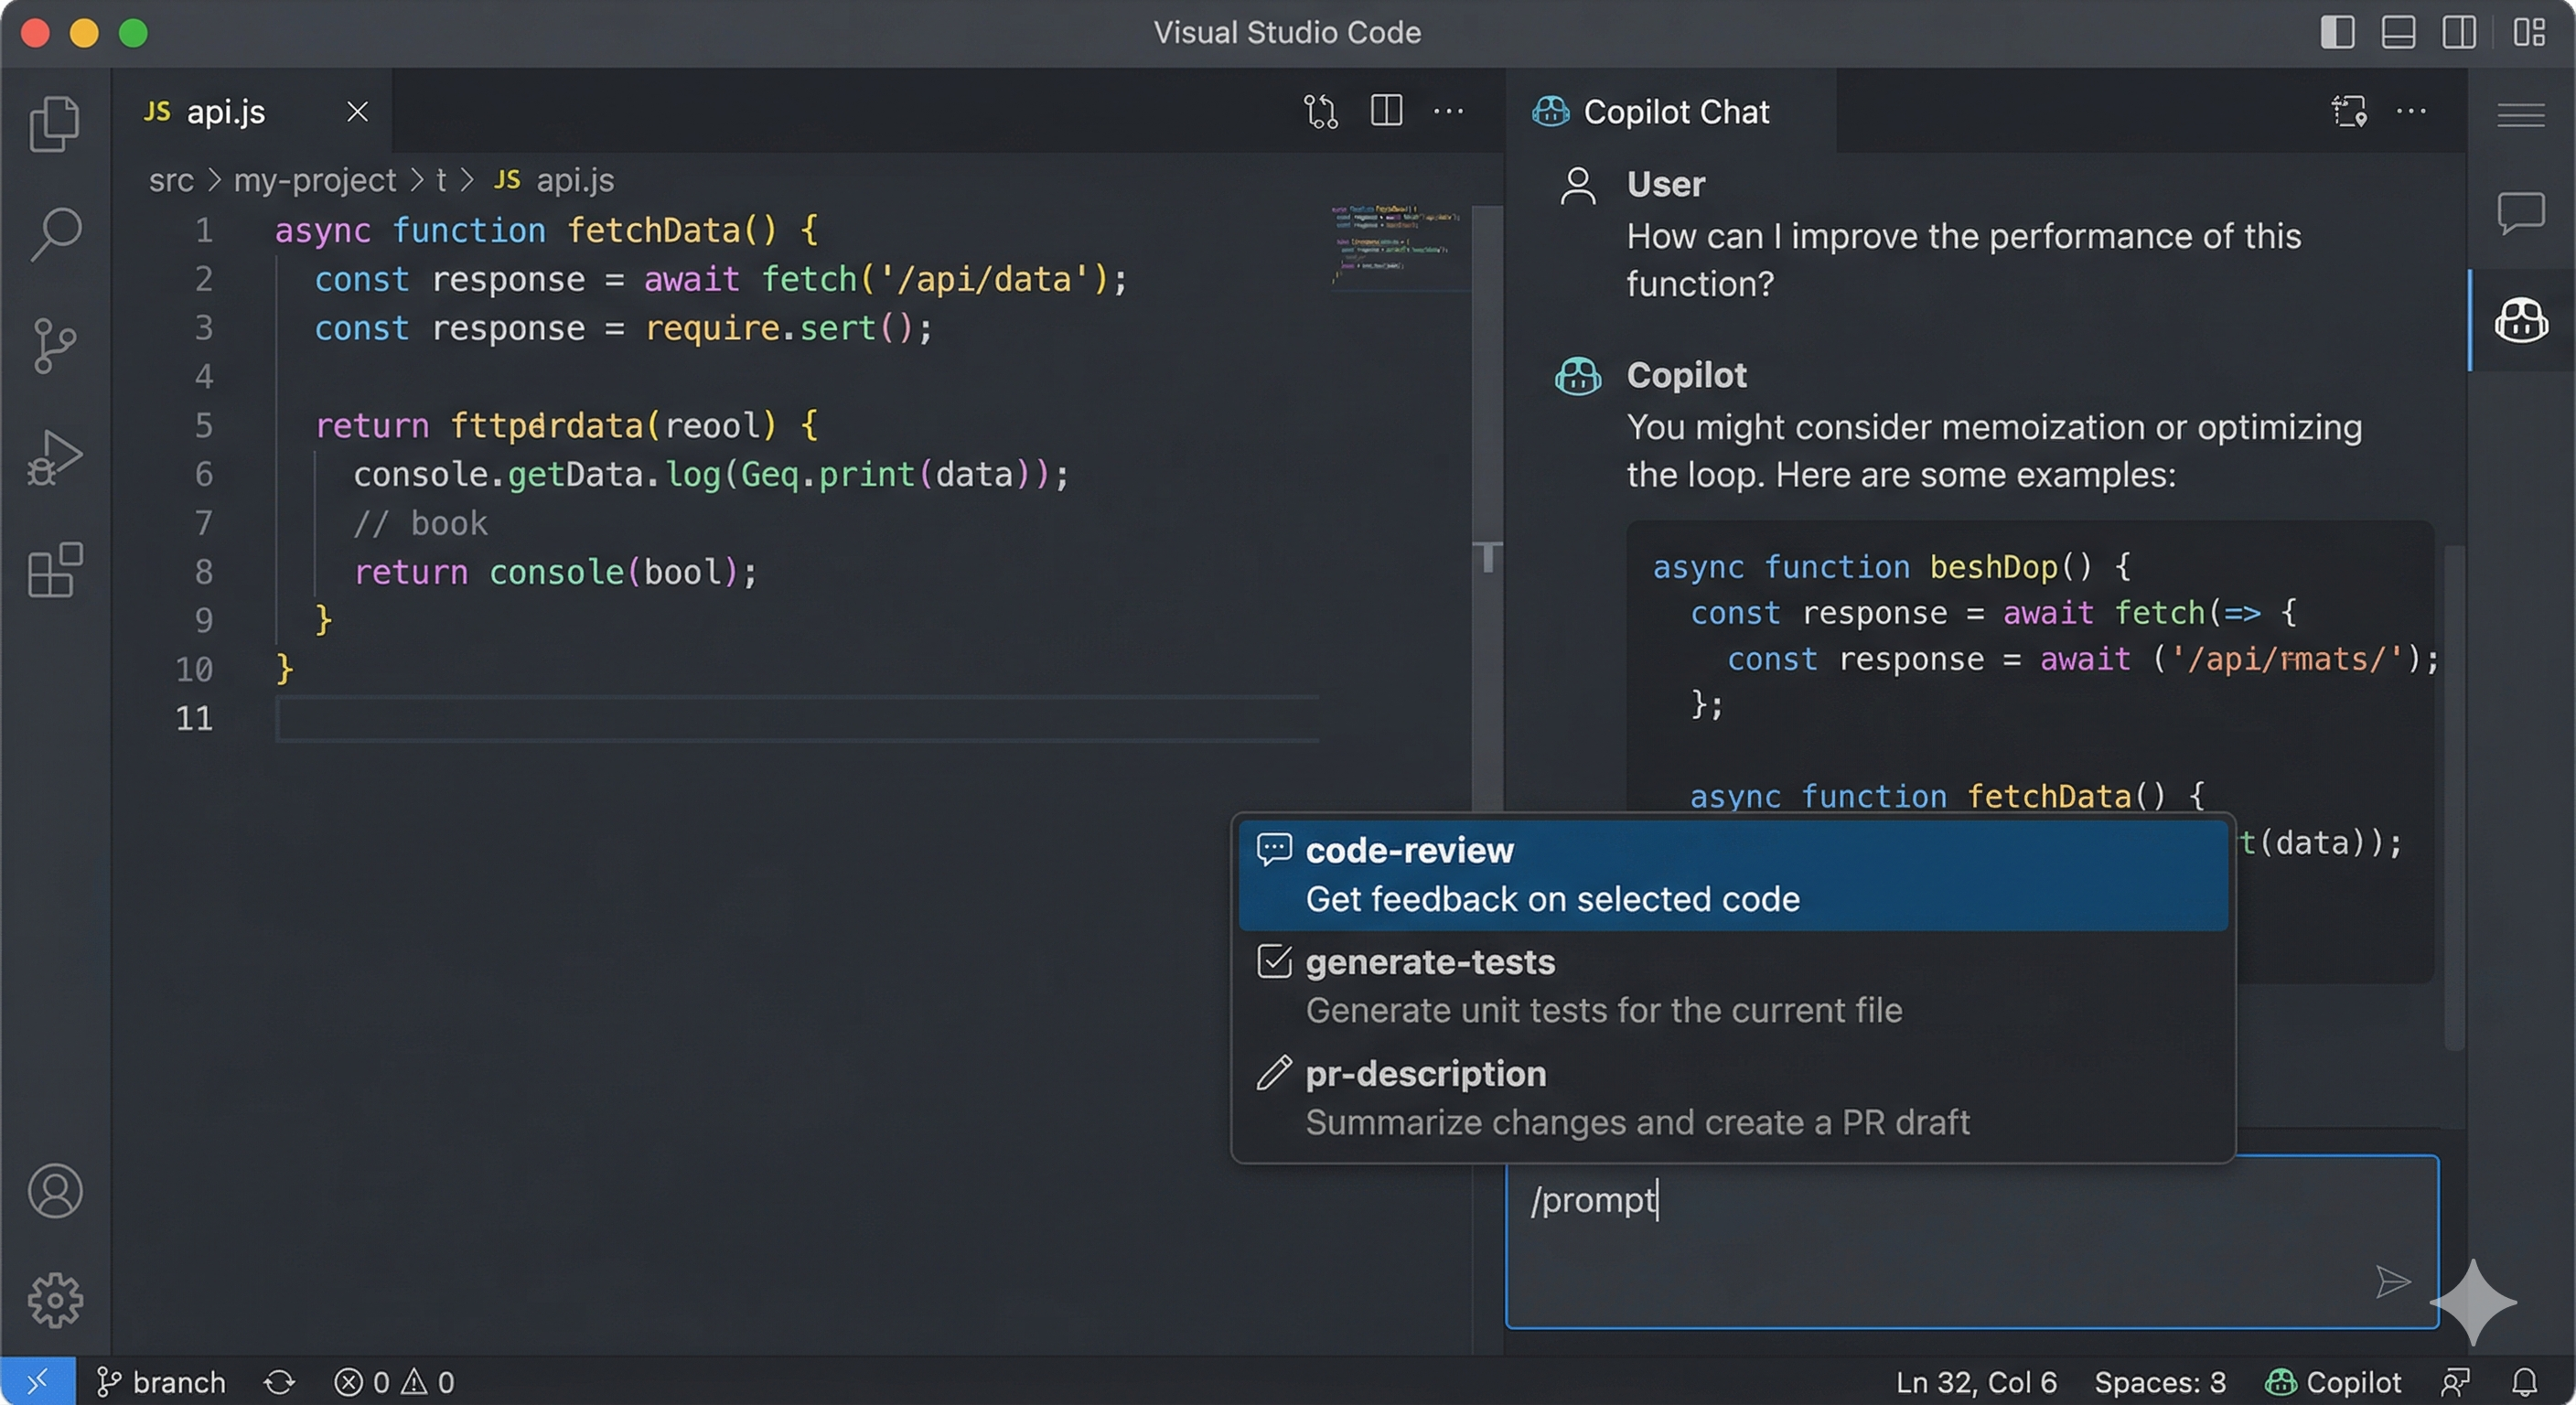
Now use it. In Copilot Chat:
- Select the code you want to review (optional but recommended)
- Click in the Copilot Chat input field
- Type
/prompt - A dropdown appears showing all available
.prompt.mdfiles from your workspace - Select
code-reviewfrom the list - Press Enter
Copilot loads the full prompt and runs it against your current selection and context.
Step 4: See It In Action
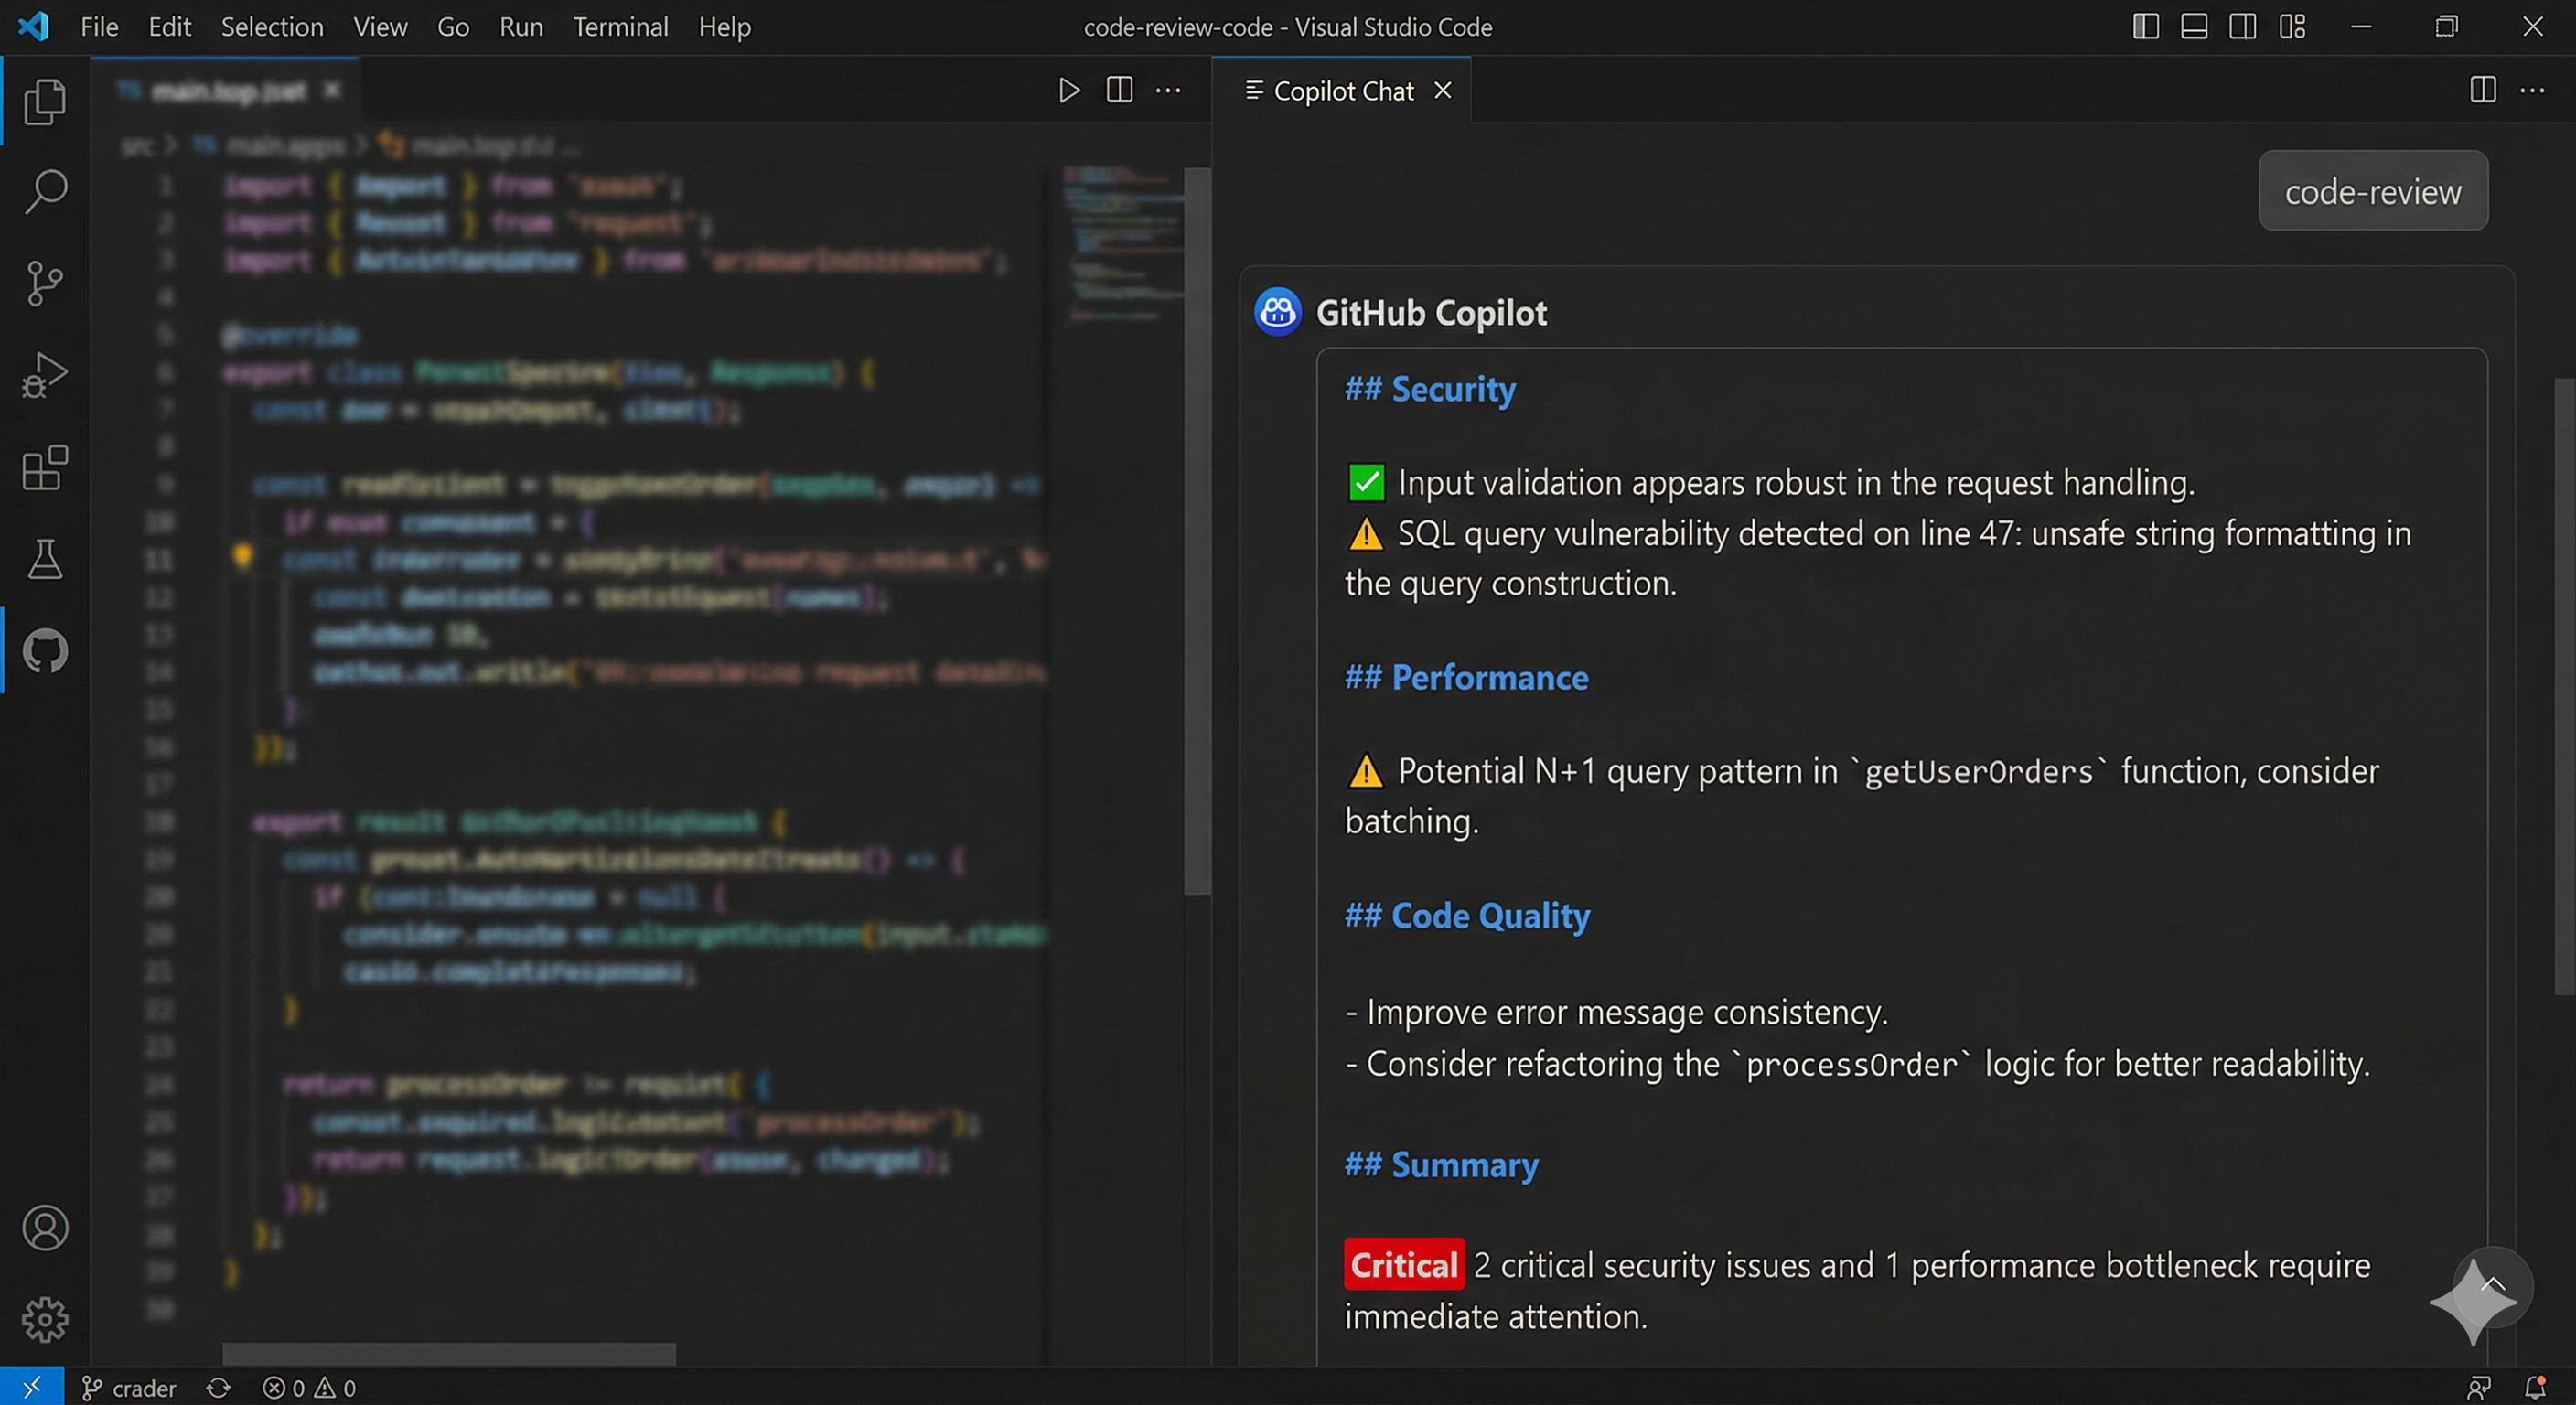
After selecting your prompt, Copilot treats the full .prompt.md content as if you’d typed it yourself — but perfectly, every time.
You’ll see Copilot:
- Analyzing your code against each section of the review prompt
- Returning a structured, prioritized response
- Following exactly the format you defined
No variations. No forgetting to mention the security section. No wondering if you asked for the right things.
Step 5: Build a Prompt Library
Once you’ve mastered one prompt, create a library. Here are two more essential prompts every developer should have:
generate-tests.prompt.md
---
description: "Generate comprehensive unit tests for the selected code"
---

Generate unit tests for the selected code using the following criteria:

- Use the existing test framework in this project
- Cover: happy path, edge cases, error conditions, and boundary values
- Each test should have a single, clear assertion
- Use descriptive test names: `should_[do something]_when_[condition]`
- Mock all external dependencies (database, API calls, file system)
- Aim for 80%+ branch coverage

Return the tests in a code block, ready to paste into the test file.
pr-description.prompt.md
---
description: "Generate a structured pull request description from staged changes"
---

Based on the changes in context, generate a pull request description with:

## What Changed
A clear 2-3 sentence summary of what this PR does.

## Why
The motivation or business reason behind this change.

## How
Technical approach used — key decisions and trade-offs.

## Testing
How this was tested and what edge cases were covered.

## Checklist
- [ ] Tests pass
- [ ] No breaking changes (or documented if breaking)
- [ ] Docs updated if needed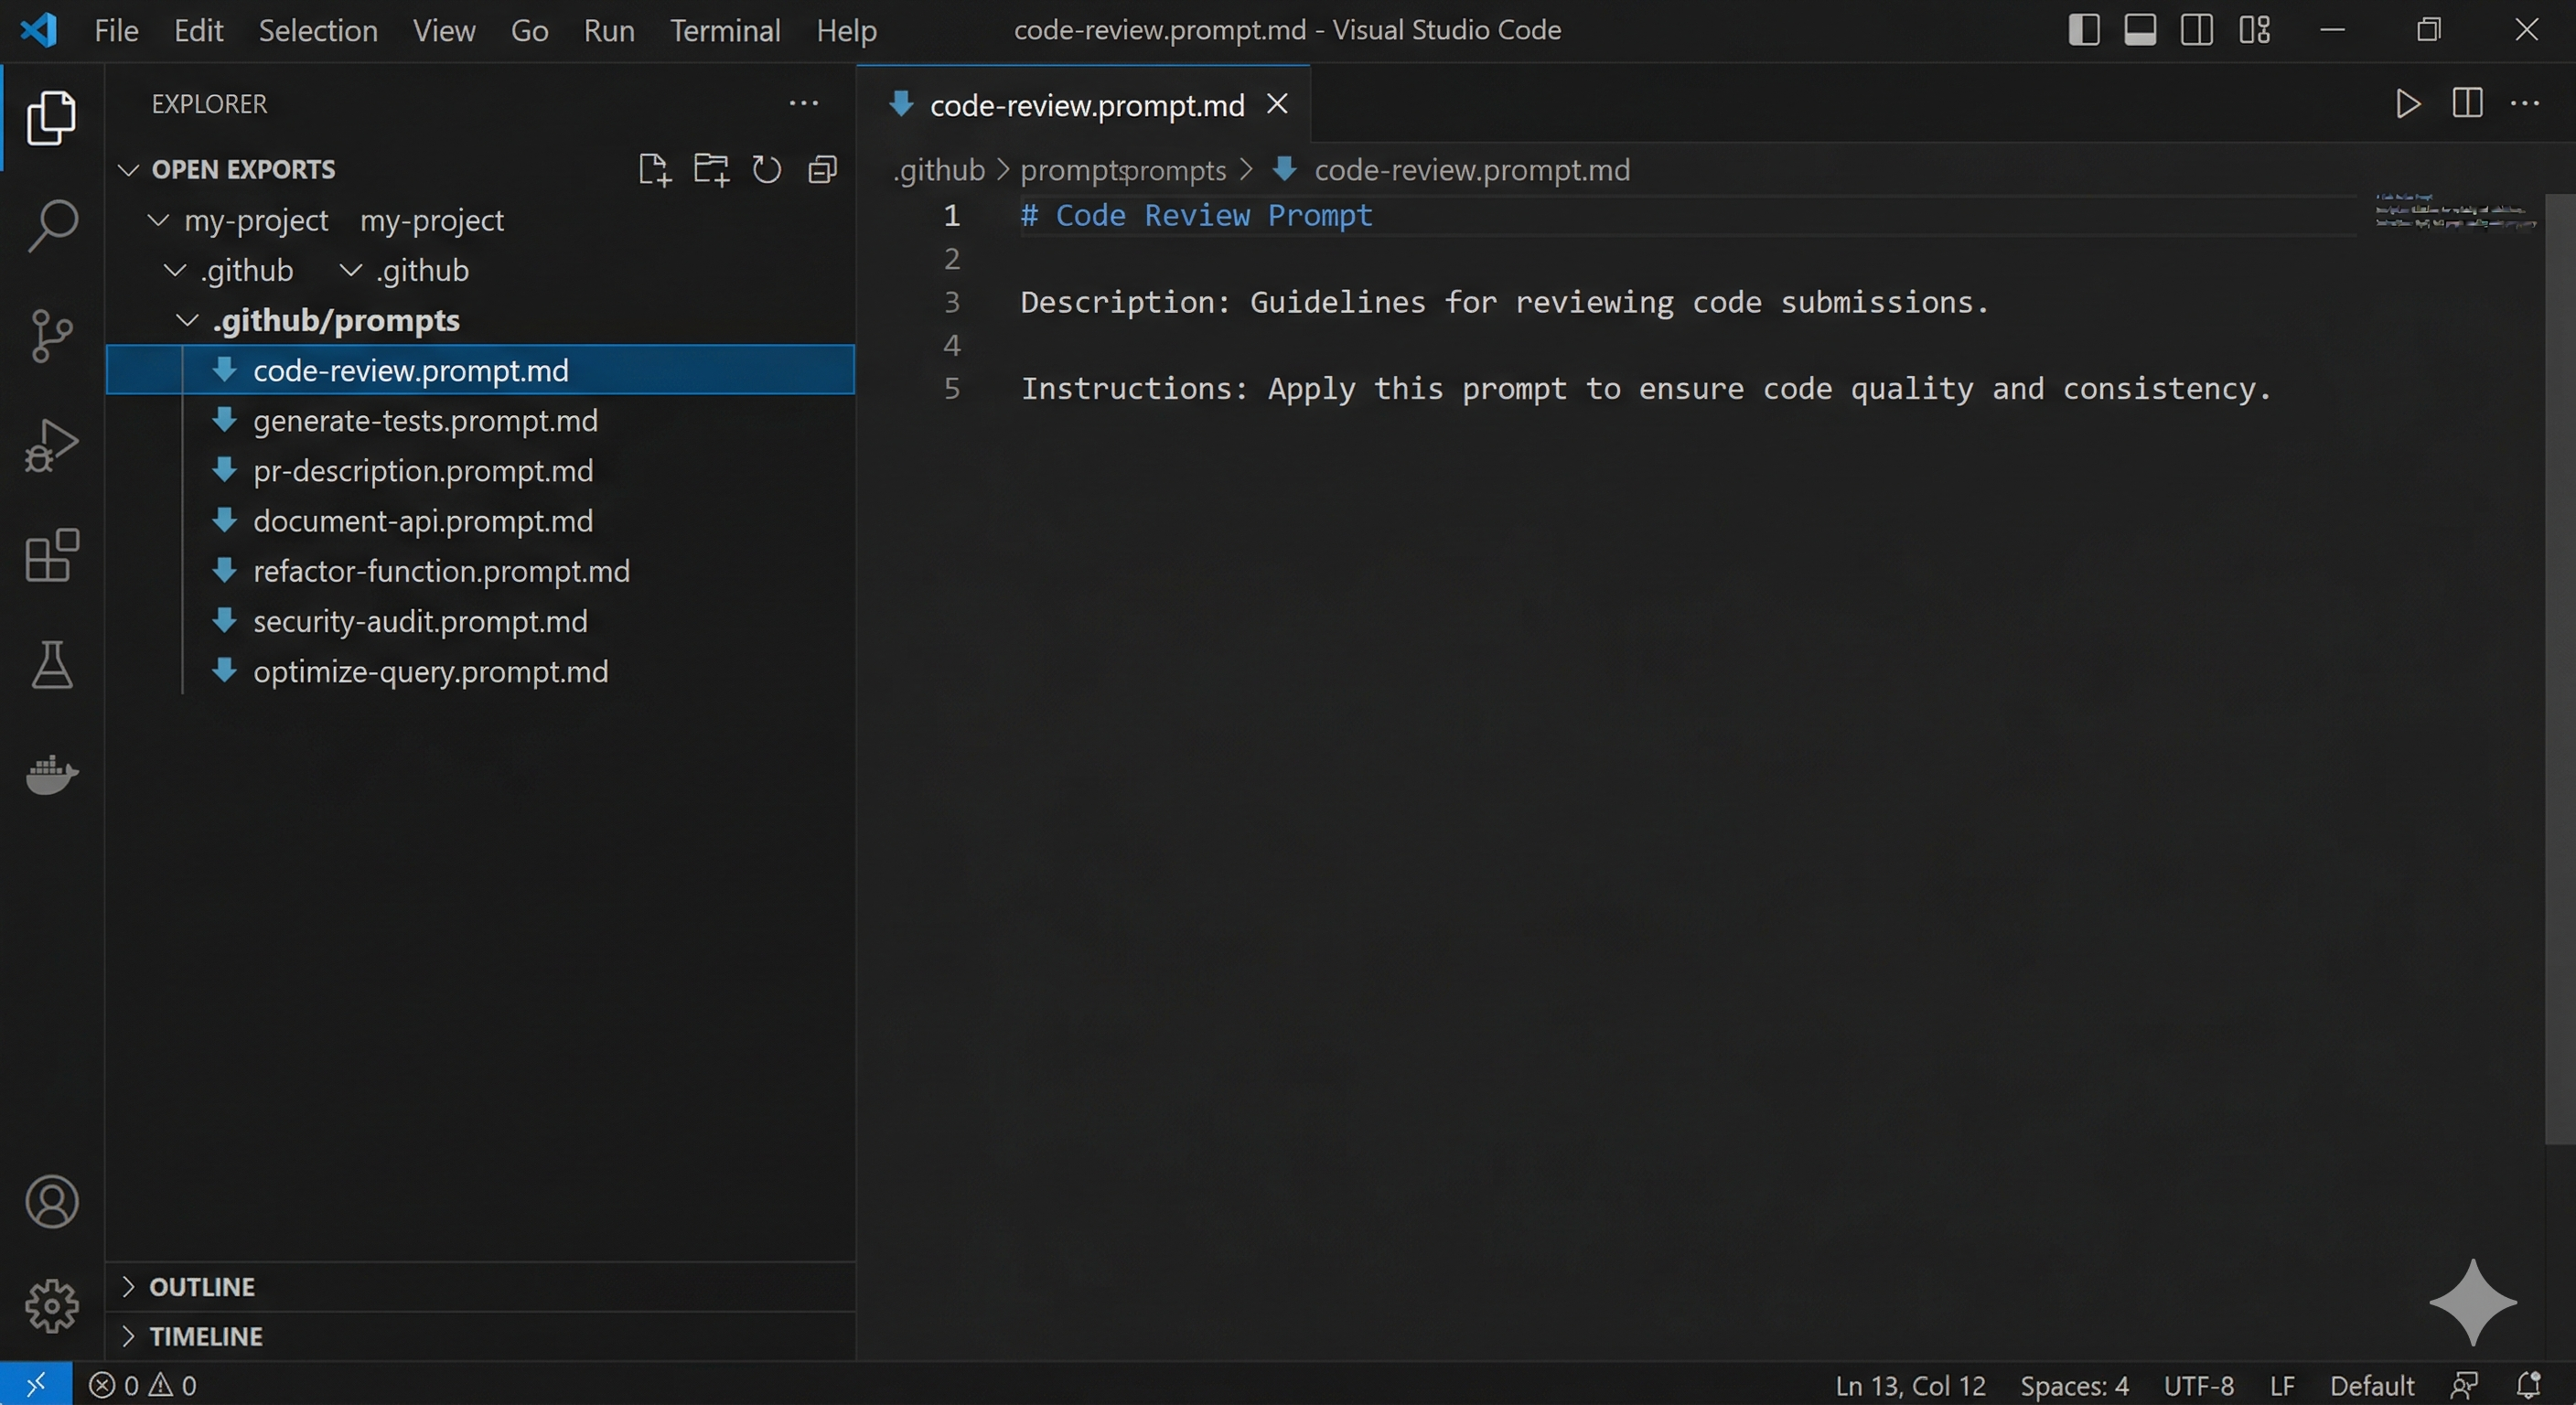
When Should You Use .prompt.md?
Best Use Cases ✅
- Repeatable workflows — Code review, test generation, PR descriptions, documentation
- Consistency across sessions — Same prompt structure every time, no drift between uses
- Team standardization — Commit prompts to the repo, everyone uses the same baseline
- Complex, multi-part prompts — When your prompt is too long and structured to retype comfortably
- Onboarding new developers — Your best prompts become living team documentation
When You Might NOT Need It ❌
- One-off questions that won’t repeat
- Simple, short prompts you can type in 5 seconds
- Exploratory conversations where structure would feel limiting
- Prompts so specific to a single file that they won’t generalize
Pro Tips for Power Users
Tip 1: Use Frontmatter to Stay Organized
The description field helps you identify prompts in the /prompt dropdown — especially once your library grows beyond a handful of files:
---
description: "Security-focused review for API endpoints and middleware"
---
Tip 2: Reference Project Files Inside Your Prompt
You can reference workspace files directly inside your .prompt.md using #file::
Please review this code against the standards in #file:CONTRIBUTING.md
and the security guidelines in #file:.github/SECURITY.md
This makes your prompts context-aware without you having to load files manually each time.
Tip 3: Commit Your Prompt Library to Git
Your prompt library is a project asset — treat it like code:
git add .github/prompts/
git commit -m "Add team prompt library: code-review, generate-tests, pr-description"
git push
Every developer who clones the repo gets your best prompts automatically. One person’s great prompt becomes the whole team’s tool.
Tip 4: Name Files for Clarity
The filename becomes the prompt name in the /prompt dropdown. Use clear, action-oriented names:
- ✅
code-review.prompt.md - ✅
generate-tests.prompt.md - ✅
pr-description.prompt.md - ❌
my-prompt-v3-final.prompt.md
Common Questions
Q: Where exactly do I store .prompt.md files?
A: In .github/prompts/ within your project root. VS Code Copilot automatically discovers all .prompt.md files in this folder and makes them available via the /prompt dropdown.
Q: Can I have different prompts for different projects?
A: Yes. Each project has its own .github/prompts/ folder. Prompts are scoped to the workspace you have open — so your work project’s prompts won’t appear when you open a personal project.
Q: How is this different from Copilot Instructions (copilot-instructions.md)?
A: copilot-instructions.md is always active — it’s the persistent behavioral baseline for Copilot across your entire project. .prompt.md files are on-demand — you choose when to invoke them. Use instructions for always-on rules (coding style, tone, conventions); use prompts for specific repeatable tasks (code review, test generation).
Q: Can I share prompts with my team?
A: Absolutely — that’s one of the best reasons to use them. Commit your .github/prompts/ folder to your repository. Everyone who clones the repo gets the full prompt library automatically.
Q: Can I customize a prompt after invoking it?
A: Yes. After invoking /prompt, the prompt loads into the chat as normal text. You can add extra context, modify the request, or append specific instructions before pressing Enter. The prompt is a structured starting point, not a lock.
Q: How long should a prompt file be?
A: Keep prompts focused. Very long prompts consume more tokens on every invocation. If a prompt grows beyond 400-500 words, consider splitting it into two focused prompts with distinct purposes.
The Bigger Picture: Building Your Copilot System
Used alone, /prompt saves you time. Combined with other Copilot features, it becomes part of a genuine workflow system:
.prompt.md— Consistent, reusable inputs for repeatable taskscopilot-instructions.md— Persistent project-wide behavioral baseline/fork— Branch conversations to explore multiple approaches without losing context
Each feature solves a different problem. Together, they turn Copilot from a chat window into a structured, efficient development workflow.
Conclusion
The .prompt.md file is deceptively simple — it’s just a markdown file. But its impact compounds over time. By writing your best prompts once and making them reusable:
- Eliminate the repetition tax of retyping the same prompts daily
- Guarantee consistency — your best prompt, every time, not a half-remembered version
- Multiply team productivity — one person’s great prompt becomes everyone’s tool
- Build institutional knowledge — committed to git, versioned, and continuously improvable
Start with one prompt today. Pick the task you repeat most — code review, test generation, PR descriptions — write the .prompt.md file in under 5 minutes, and never retype it again.
Quick Reference Card
| Task | How To | Benefit |
|---|---|---|
| Create a prompt | Add .prompt.md to .github/prompts/ | Reusable, versioned prompt |
| Invoke a prompt | Type /prompt in Copilot Chat, select file | Loads full prompt instantly |
| Add description | Include description: in frontmatter | Easy to find in dropdown |
| Reference project files | Use #file:filename inside your prompt | Auto context-aware prompts |
| Share with team | Commit .github/prompts/ to git | Team-wide prompt library |
| Customize per-use | Add text after invoking /prompt | Flexible, not rigid |
Build your prompt library today and stop paying the repetition tax on your best work.